Though some may favor a minimalist holiday, we like to believe the more the merrier when it comes to festive decor and Christmas spirit! Bring on the sprinkles!
Festive doesn’t have to mean complicated, though, and one of our favorite tricks for Christmas cheer just happens to also be one of the easiest. With some white chocolate, food coloring, and ten minutes, you can make cute little Christmas tree toppers to decorate otherwise basic holiday desserts.
To make these Christmas tree toppers, you’ll need white melting chocolate (sometimes called coating chocolate), green food coloring, and wooden skewers (choose the size that makes the most sense for your item. For a layer cake, choose longer skewers than for cupcakes). You’ll need a vessel to squeeze the melted chocolate from, which can be a squeeze bottle, piping bag, or even just a zip-top sandwich bag.
- Melt the white chocolate. Use a double bowler or the microwave. Remember that if heated too much or too quickly, the chocolate can become thick and difficult to work with. So keep the heat low if using the stove, and only microwave in short, ten seconds bursts.
- Add enough food coloring to achieve the shade of green you want. If you would prefer your trees to be pink, purple, blue, or orange, go for it! White trees would also be a beautiful option for a snowy theme.
- Transfer the chocolate to your squeeze bottle (or piping bag, etc.). Cut the tip to a fine point, or as thick as you would like your trees to be.
- Place parchment paper on a clean, flat surface. Arrange skewers on the parchment paper, leaving space in between to fit the body of your trees.
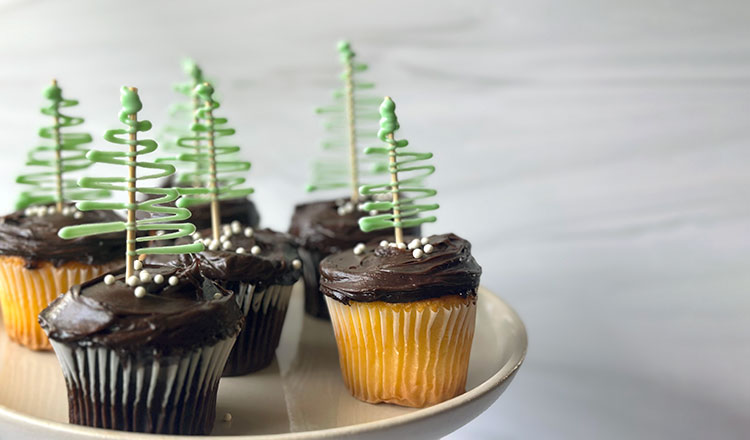
- Before you start your trees, test the stream of your chocolate to make sure it’s smooth. Then, one at a time, pipe the chocolate in one continuous stream starting at the center of the skewer (VIDEO BELOW!). Work back and forth to create the body of the tree, tapering your stroke as you go to create the shape of a Christmas tree. Go back over the trees to add more chocolate if you like. Heaver lines will be easier to handle.
- If you would like, decorate the trees with small sprinkles, nonpareils, or edible glitter right away, before the chocolate sets.
- Leave the toppers to set until matte and firm, a least 10 minutes. If they peel easily from the parchment paper, they’re ready.
- Decorate your items right away, or store the toppers in a tightly sealed container in a cool spot (but do not refrigerate). Since they are delicate, the toppers will melt easily if left in the sun or a hot kitchen.