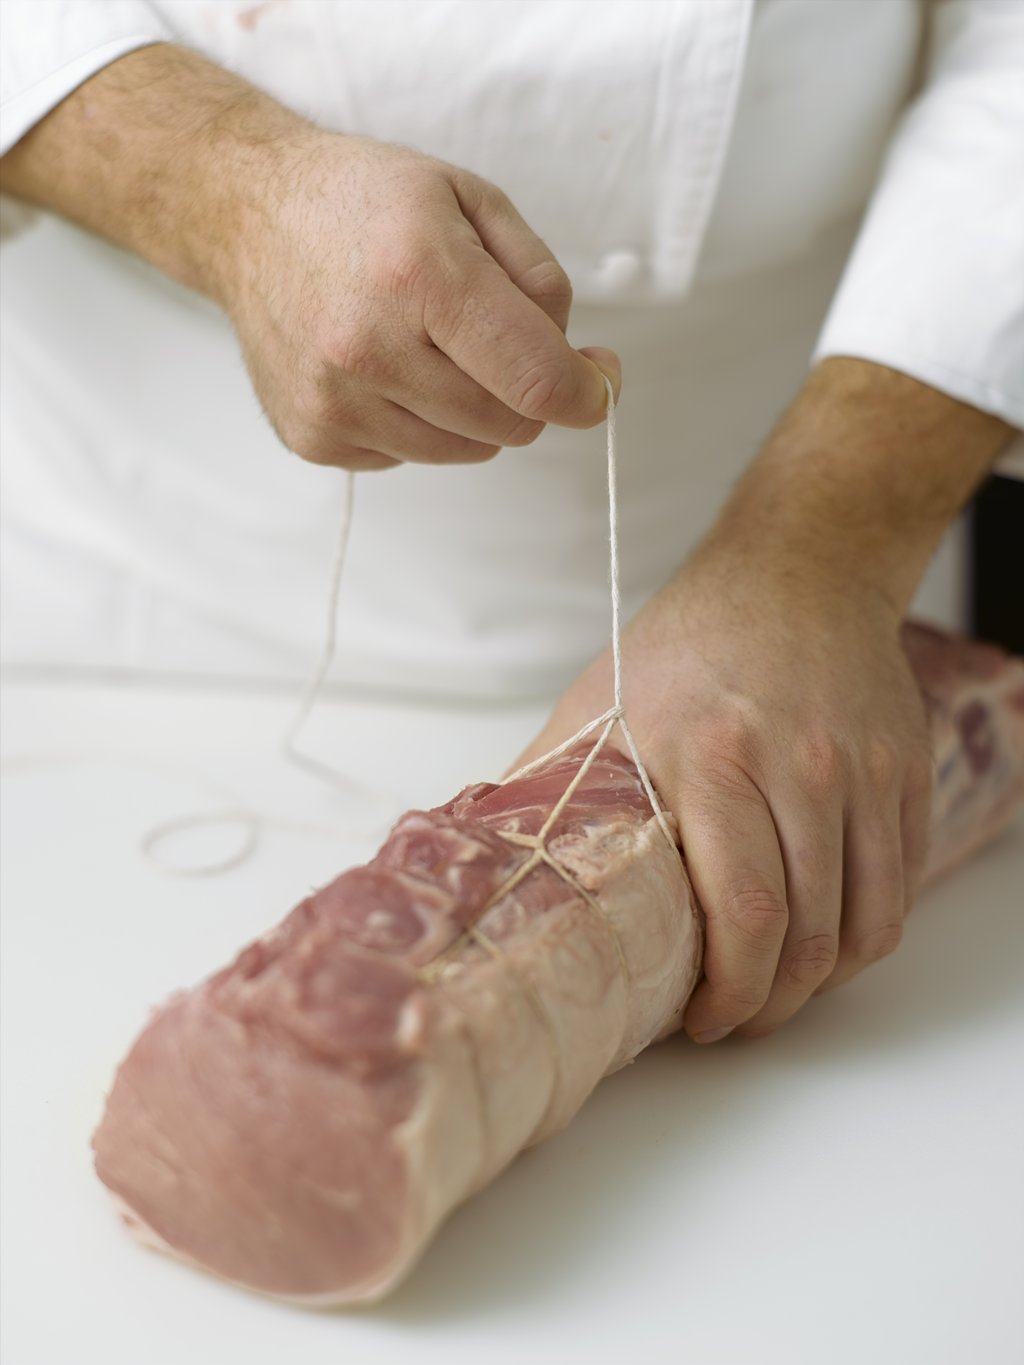
Tying a roast with secure knots that have the right tension is one of the simplest and most frequently required types of meat fabrication and preparation. It ensures that the roast will cook evenly and that it will retain its shape after roasting.
Though a perfectly tied roast is a thing of beauty, as long as the string is taut enough to give the roast a compact shape, without being too tight, the result will be fine. Leave the string very long so that it will wrap easily around the entire diameter and length of the meat. Or leave the string attached to the spool and cut it only when the entire roast has been tied.
Though there are many techniques for tying a roast, are our two most-used are shown below. Both techniques illustrated here work for both boneless and bone-in roasts. The choice of technique is a matter of personal preference.
Technique One
Step 1
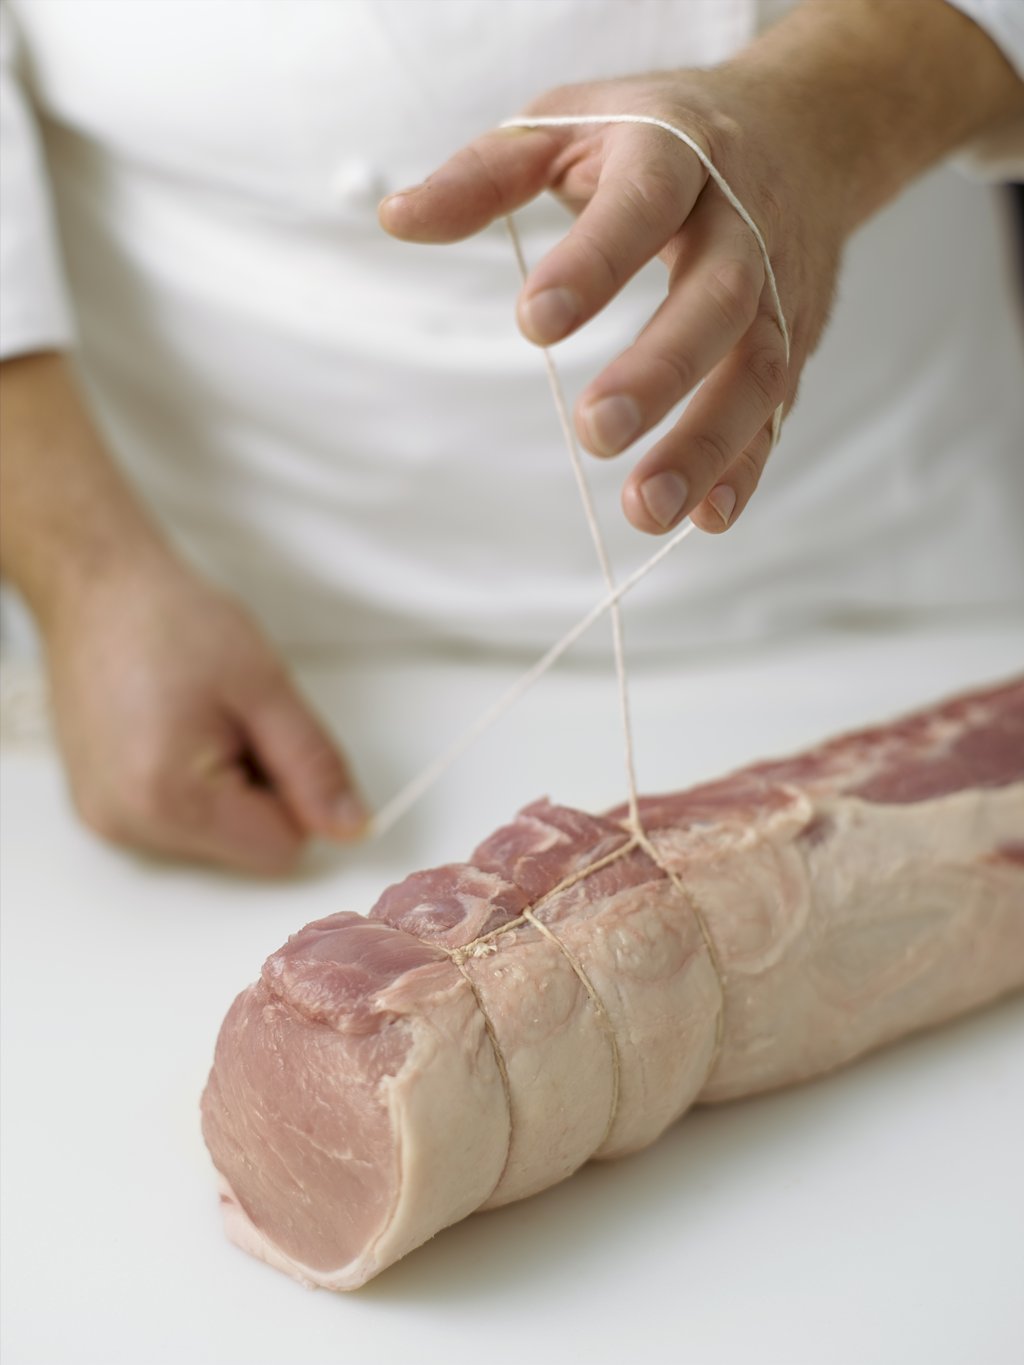
Pass the string around your outspread fingers and thumb so that the string crosses itself and makes an X.
Step 2
Spread your hand open to enlarge the loop.
Step 3
Continue to enlarge the loop until it is wide enough to pass easily around the thicker end of the meat, completely encircling it.
Step 4
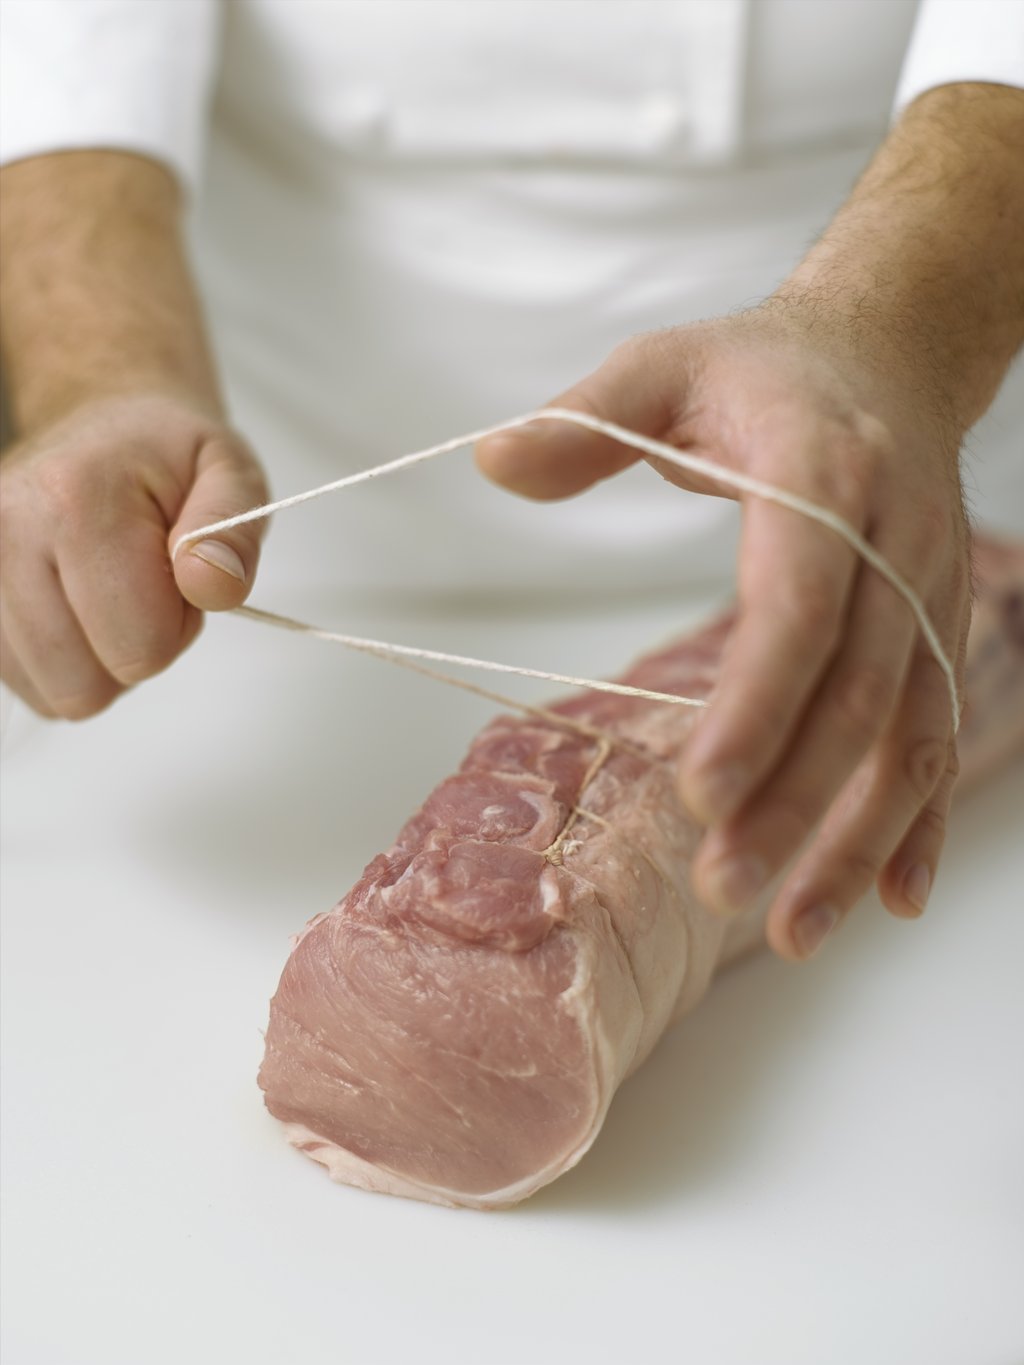
Encircle the meat with the loop, making sure that the knots are spaced evenly apart from one another.
Step 5
Pull the loose end of the string until the loop is securely tightened around the meat. Note that the string has formed a half hitch knot at this point. Continue until the entire piece of meat has been secured with loops.
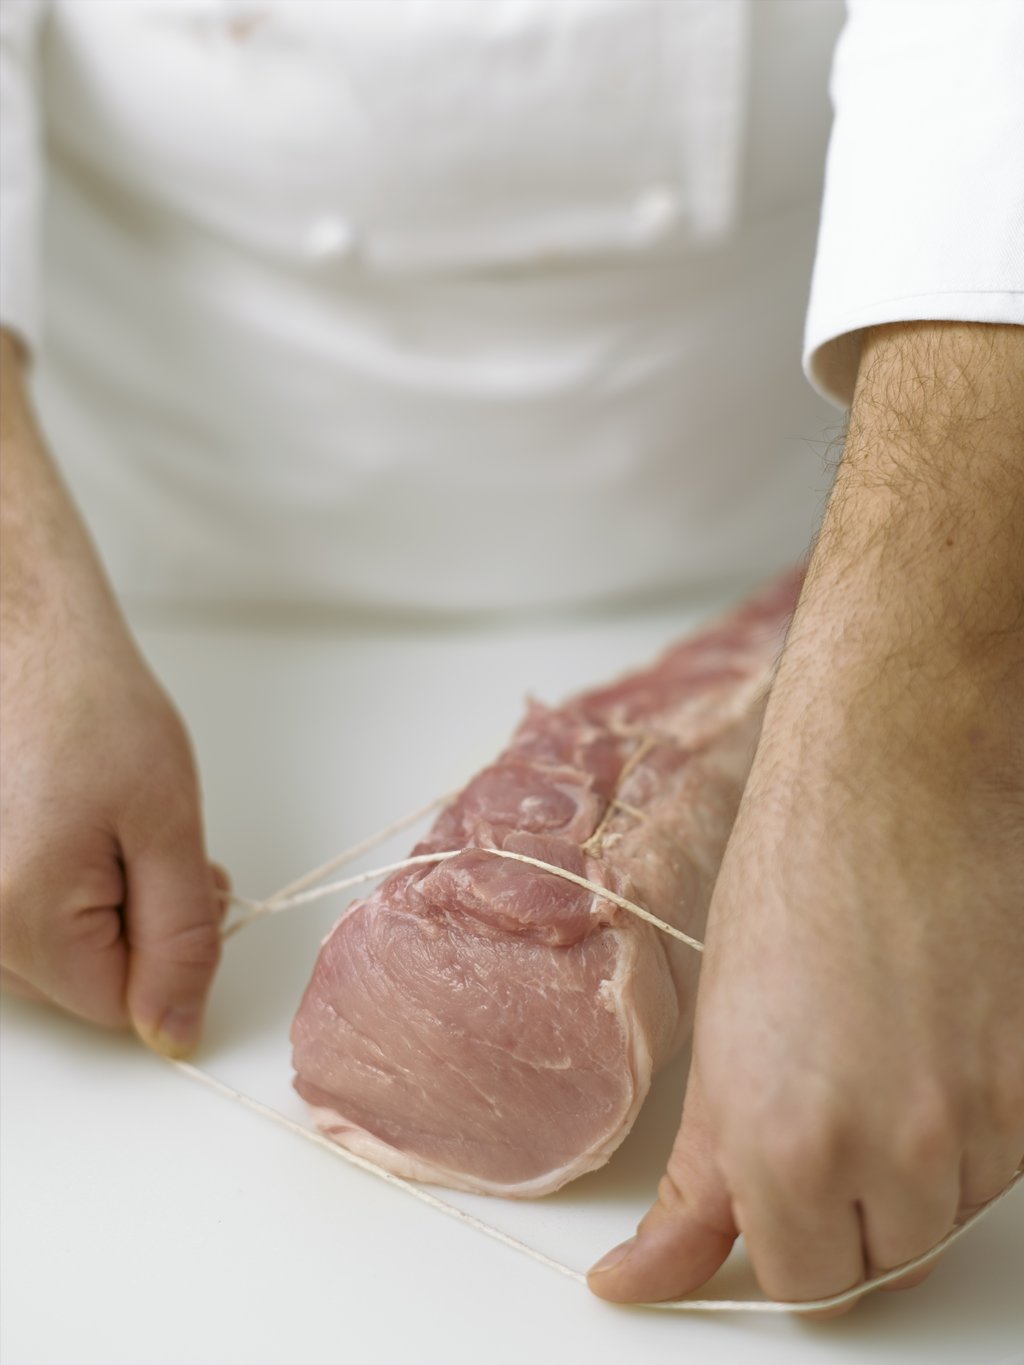
Step 6
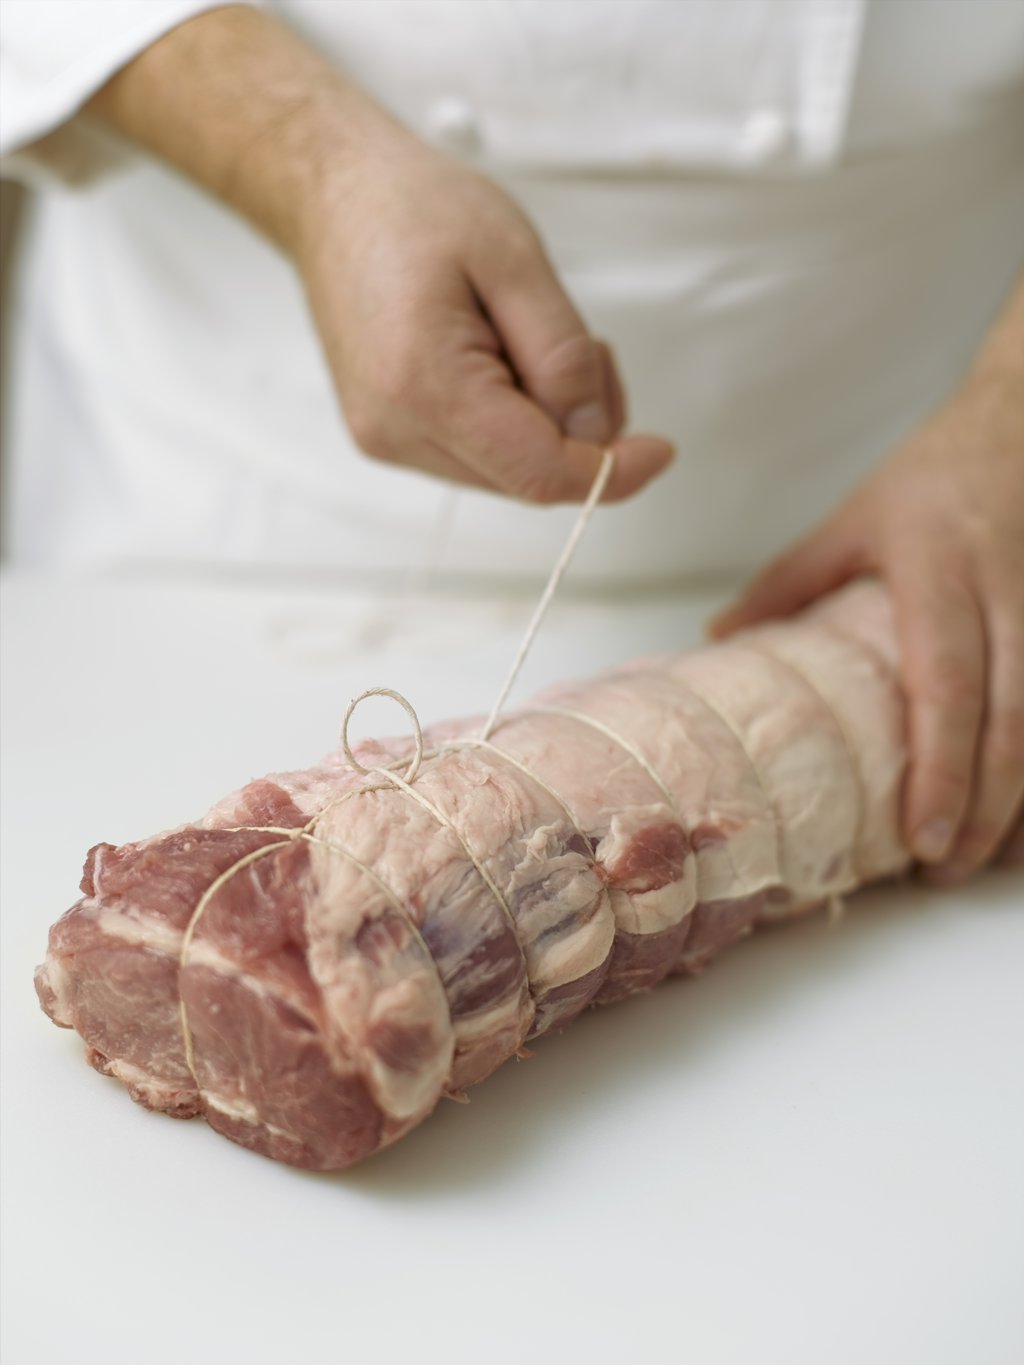
Turn the piece of meat over. Pass the loose end of the string through the loop, then pass it back around and underneath the loop. Pull the string tight and continue down the length of the meat.
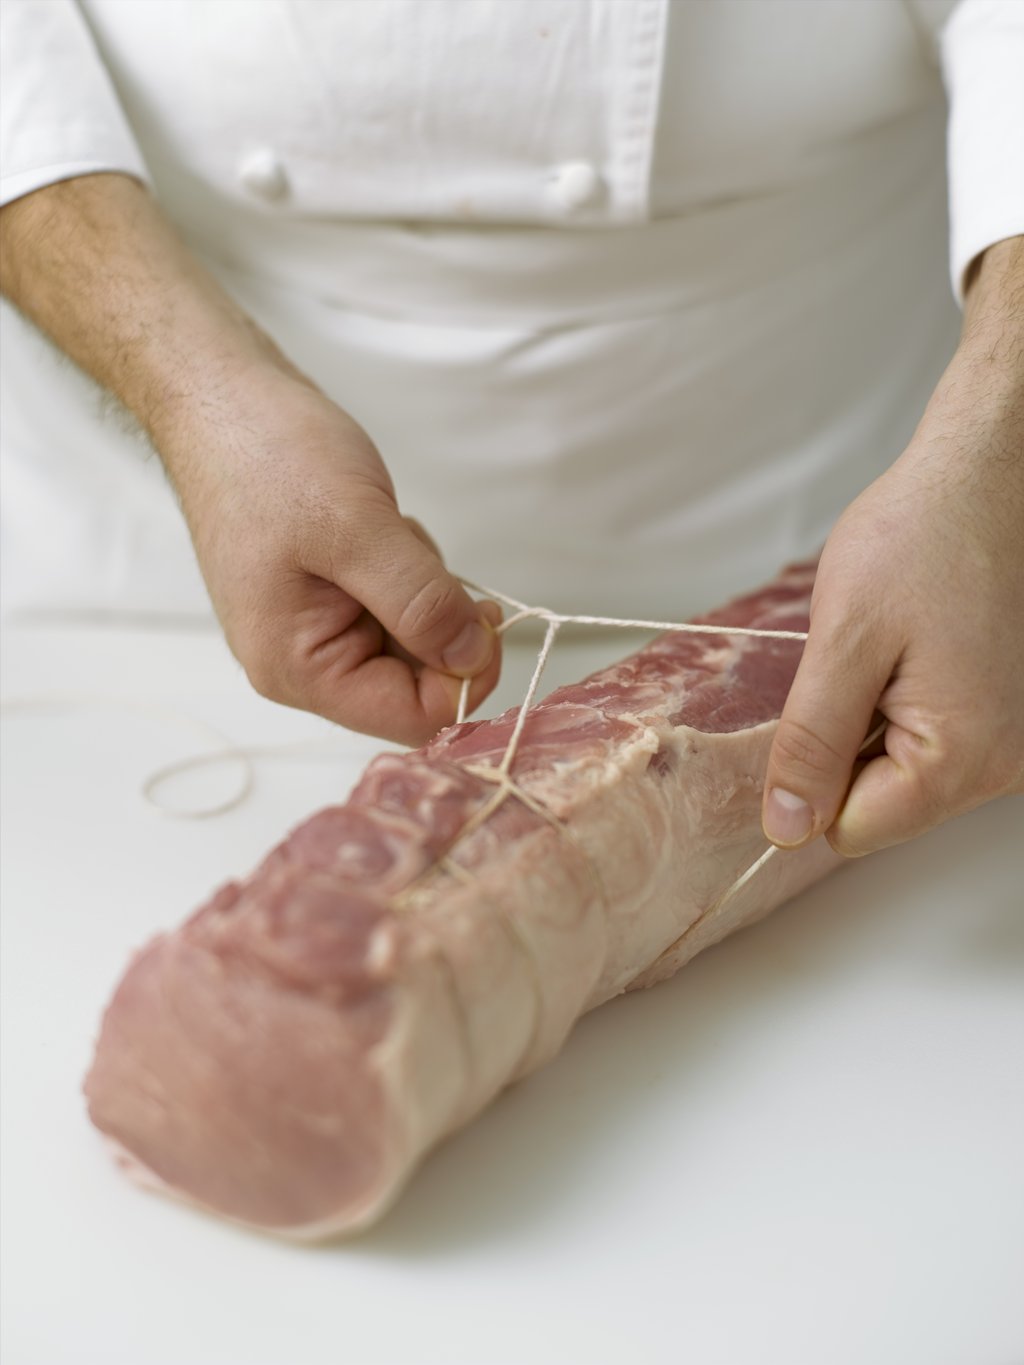
Step 7
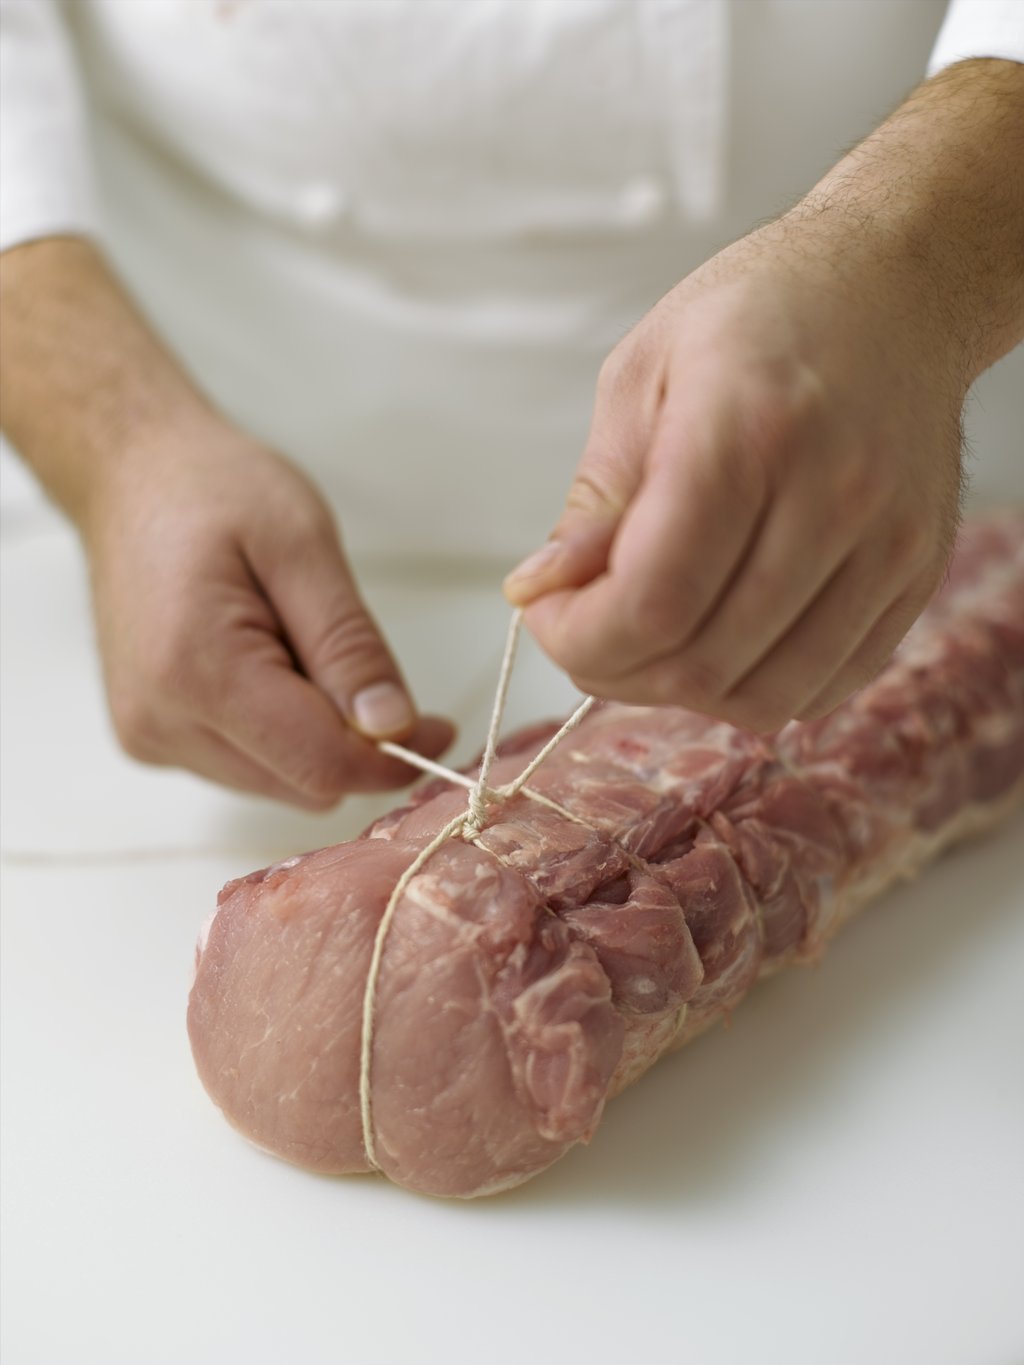
Once the string has been wrapped around each loop from one end to the other, turn the meat back over. Cut the loose end and tie the string securely to the first loop.
Technique Two
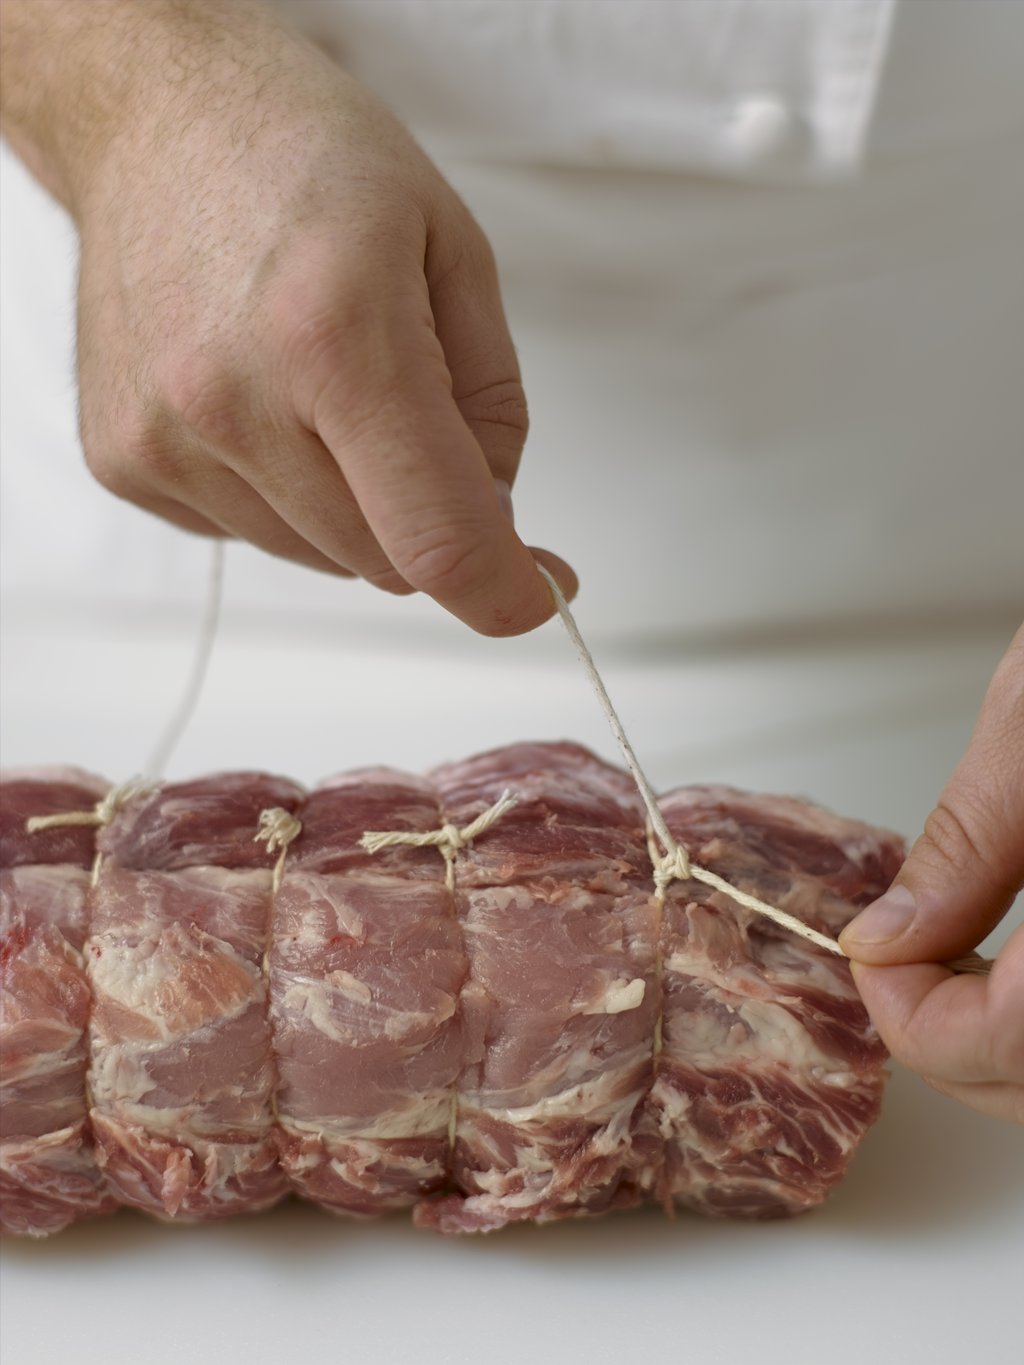
For this tying technique, cut several lengths of string. Each piece should be long enough to wrap completely around the meat with sufficient additional length to tie a series of double knots.
roast // tying // trussing // low and slow // roasting // pork roast // pot roast // meat fabrication
that second one feels like cheating. Doesn’t mean I won’t use it…lol
No such thing as cheating when there are no rules. If it gets the job done, it counts! 🙂