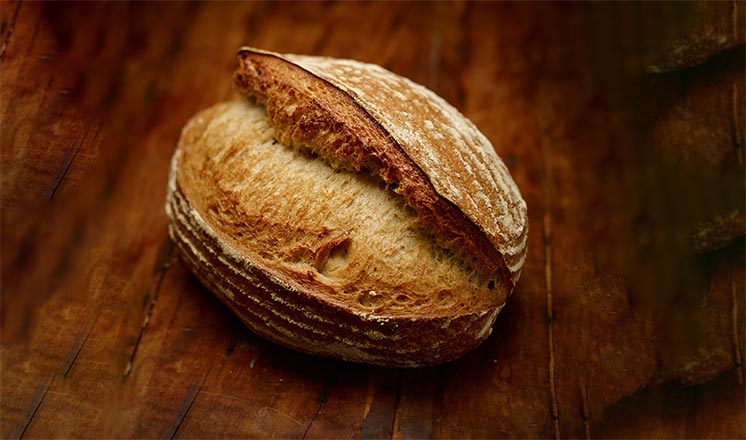
Ready for at-home bread baking with your very own sourdough starter? Follow this schedule to create your own starter in 5 to 7 days. For more information about starters, see Sourdough Starters: 101.
DAY 1
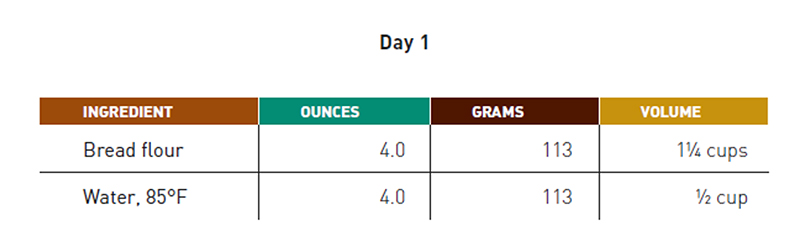
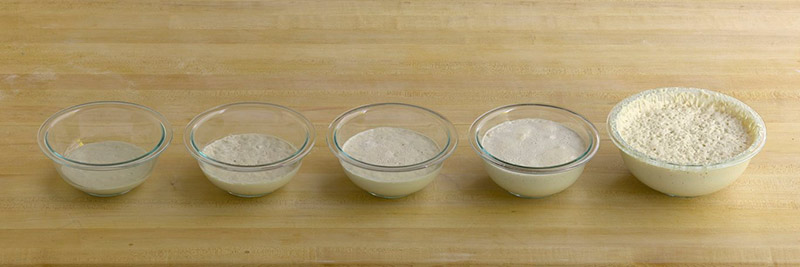
Mix equal amounts of flour with water (at 85°F) until the mixture is homogenous. Use a bowl big enough for the mixture to double in size. The bowl should be glass or stainless steel, since these, unlike plastic, are less likely to retain odors. (You may use plastic if the vessel is fresh and reserved for this purpose.) Once you have finished mixing and have scraped down the bowl to make it look tidy, cover and let it sit at room temperature for 18 to 24 hours. The goal during this time is for the enzymes to break down the starches in the flour into sugars. Any wild yeast present on the flour or in the air will begin feeding on these sugars.
DAY 2
Uncover your bowl and you will notice that something is happening. You will probably see that your mixture is still wet, but the aroma will have changed from a floury smell to something riper. You will probably see some bubbling. You should not be seeing streaks of mold: If you are, throw it out and start over. If everything looks good, use a clean hand or utensil to mix it together again. (If any foreign bacteria get into the dough, this can change the sour and overtake it.) By mixing the sour, you are moving around the food for the yeast, incorporating air and expelling gas, as well as equalizing the temperature and strengthening the structure. There is no need to feed your starter today. Scrape anything off the sides of your bowl into the mix, cover, and let it sit for another 18 to 24 hours so it has more time to develop acidity and flavor.
DAY 3
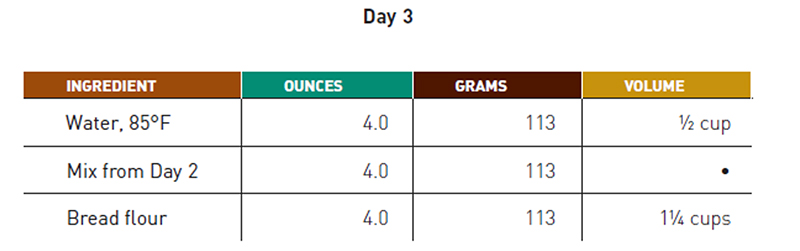
When you uncover your bowl today, you will notice an even greater change. It should be very bubbly and smell pleasantly fermented. Your wild yeast is ready for a new supply of food. Use a scale to weigh the amount of mixture you need and discard the rest. (Yes, this may seem like a waste, but you don’t want your starter to take over your kitchen, so you must throw some out along the way to keep its size in check.) Next, you will place equal parts of fresh water (at 85°F) and your starter mixture from the previous day into a clean mixing bowl. Once you have blended these together, add an equal part of flour to the mix and blend with your hands until it’s homogenous. Scrape down the sides of your bowl, cover, and let it sit for another 18 to 24 hours.
DAY 4
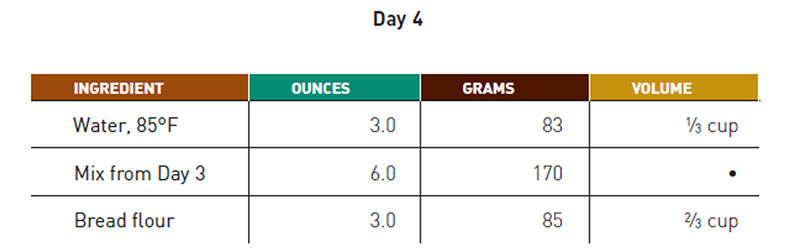
What will you find in the bowl today? The mixture should look different from the one you left the previous day. It should be bubbly, still somewhat soupy, and smell pleasantly fermented, but with a stronger aroma than the previous day. Today when you feed the starter, your proportions will be different: a ratio of water, starter and flour that is 1:2:1. Why? You want to give the wild yeast a chance to take off. Keep the water warm at 85°F. Once you have blended the ingredients, the mixture will be looser than what you saw yesterday. Scrape down the bowl, cover, and let it sit for another 18 to 24 hours.
DAYS 5 to 7
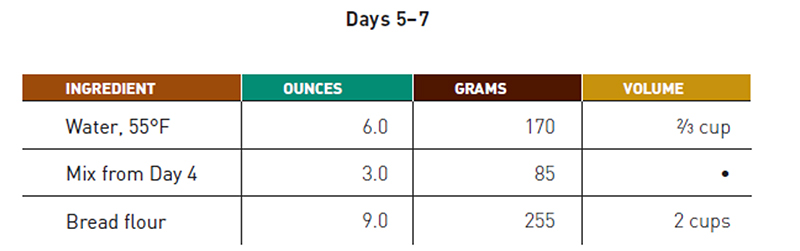
When you prepare to feed your starter on Day 5, you will notice it has become very aromatic and bubbly. It is sitting higher in the container than what you saw the previous day. The smell will be very strong. From here on out, when you feed your starter, you will be using a ratio of 2:1:3. That’s two parts water, one part sour and three parts flour.
You may save as little as 8 oz of the starter, but may refresh as little as you require for the bread you want to make, as seen in the amounts given in the preceding example. The remaining sour would then be discarded. Also, your water should now be at 55°F. The water must be cooler to slow down fermentation in order to build flavor and acidity. You want to level off the starter and let it work itself into the proper balance and range of both acidity and leavening.
Place the water (at 55°F) and the previous day’s mix in a bowl and stir it together until dissolved. Add the flour and mix until homogenous. Scrape the bowl down, cover, and let it sit in a place that is at moderate room temperature (68–72°F). After feeding, the sour will be stiffer today, more like a dough. For the next several days, due to the fermentation activity, your starter will look overfermented and broken down when you uncover the container.
My Starter’s Ready—What Now?—Maintaining and Baking with a Sour
Once you have established your sour (meaning you have fed your starter for seven days and it has been fermenting for about eighteen hours since the last feeding), you are ready to make bread with it. Your recipe will tell you what to do.
Or you can decide to keep the sour going until you are ready to bake. How do you do this? There are several options. Some people like to keep a sour at room temperature, feeding it once a day with a 2:1:3 ratio (2 parts water, 1 part sour, 3 parts flour). But you may also give the sour another feeding and place it immediately in the refrigerator until needed. In this case you will need to “refresh” it when you are ready to bake.
Two questions may come to mind here: 1) Why put it immediately in the refrigerator? And 2) What does it mean to “refresh?”
Answer 1: If you were to place the sour in the refrigerator after it had fermented for eighteen hours without feeding it (i.e., your Day 7 feeding was completed and the sour had fermented for a day), it would be overfermented when you went back to use it and it would not work because the yeast would have eaten all of the available food and there would be no yeast activity to leaven your bread.
Answer 2: To “refresh” a sour simply means that you feed the sour again for several days so it comes back up to strength. Again: Once you establish your sour, you either bake with it or keep it alive.
When you are ready to refresh, remove the sour from the refrigerator and let it come to room temperature for one day. Then start a “Day 5” feeding for two or three days.
How to Feed (or Refresh) a White Sour Base
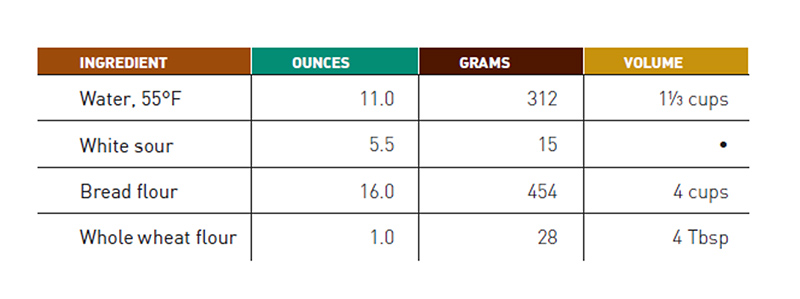
Do this once a day if you are keeping your sour at room temperature (this is then “feeding” the sour). Or, if your sour is in the refrigerator (this step is then “refreshing” your sour), remove it and allow it to come to room temperature for one day, then feed it for two to three days. It should appear as it did in Days 5–7 when you were building your starter.
Think about when you will need to use a refrigerated sour and plan ahead. You want it to be refreshed eighteen to twenty-four hours before you plan to bake bread, so you will need to allow for one day of the sour coming to room temperature, and two to three days of feedings (plus eighteen hours of fermentation after the last feeding)—this means that you’ll need to plan ahead four or five days. If you want to just keep the sour alive, put it immediately in the refrigerator after the last feeding without letting it ferment again. Then refresh it at least once every three weeks or a few days before you are ready to use it to bake bread.
Whether you are feeding or refreshing your sour, you will know it is ready when it appears and smells as it did when you finished first developing it. If you are feeding a sour to maintain it and are not baking, you will have to throw away a portion of it, but you always want to save a minimum of 8 oz to maintain the health of your starter and for ease of refreshing for baking.