In baking, every step matters—from mixing to baking, but just as importantly, cooling! While we often romanticize baked goods fresh from the oven, most baked items like cakes (and yes, breads!) are best once cooled.
Baking is a series of chemical and physical reactions spurred by the heat of the oven. The cooling period is an extension of that time, where starches gelatinize and fats solidify, creating the intended final structure, texture, and flavor. For cakes, of course, a still-warm cake is delicate, difficult to transfer, and nearly impossible to frost. Since most icings and glazes contain fat, any residual warmth from your cake will melt any butter or oil, causing that frosting to slide right down the sides of your perfectly baked cake.
To make sure your cakes are starting off on the right foot, follow these steps:
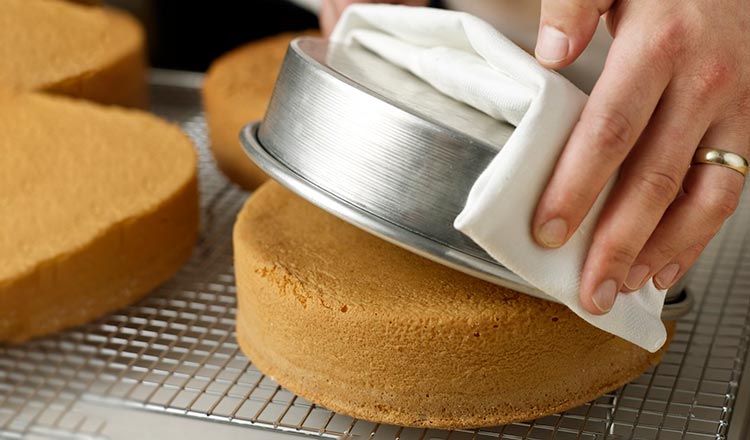
- Remove the cake from the oven and place it on a cooling rack so that the air can circulate around the entire pan. Once the cake is cool to the touch, it can be removed from the pan with less chance of breakage.
- If necessary, carefully loosen the cake from the sides of the pan with a paring knife. If your cake seems to be sticking at the bottom, tap the edges of the pan on a towel-padded surface to help it release.
- Place one cardboard circle on top of the cake. Place one hand under the cake pan and the other hand on top of the cardboard circle. Flip the cake pan over so that the cake comes out onto the cardboard circle. Remove the parchment circle from the cake bottom if there is one. Place a second cardboard circle on the cake and flip. Remove the cardboard circle from the top of the cake.
- If the top of the cake has a bump that needs to be cut off before icing, then place another cardboard circle on top of the inverted cake and flip it back over. Remove the first cardboard circle and cut the top of the cake so it is level.
If you are not using the cake right away, it can be wrapped in plastic wrap once it has cooled completely and stored at room temperature for up to two days, or in the freezer for up to 3 weeks.
Thanks for this!
Many recipes call for removing the cake from the pan after cooling for 10-15 minutes, and then leaving to cool fully on a rack. Other than the possibility of the cake sticking to the pan or the cake falling apart, is there any reason to not do this? What are the advantages either way?
Removing the cake from the pan helps it cool quickly and evenly. Leaving it in the pan can cause some delicate cakes to fall, and the edges can sometimes end up gummy and sticky from steaming in the pan. Most often, your cake will not suffer dramatically if left in the pan, and I’ve been known to cool mine in the overnight if I have a late baking session!